
If you own an Apple product, chances are you have an Apple ID. Whether you need to update your email or address security concerns, changing your Apple ID is simple and important for keeping your account up-to-date. Here is a step-by-step guide on how to change your Apple ID email address.
Changing your Apple ID email can be done through your iPhone or iPad’s Settings app or on Apple’s website. Here are the steps to change your Apple ID email on your device:
1. Open the Settings app.
2. Tap on your name.
3. Tap on Sign-In & Security.
4. Tap the Edit button next to Email & Phone Numbers.
5. Delete the old email labeled as your Apple ID.
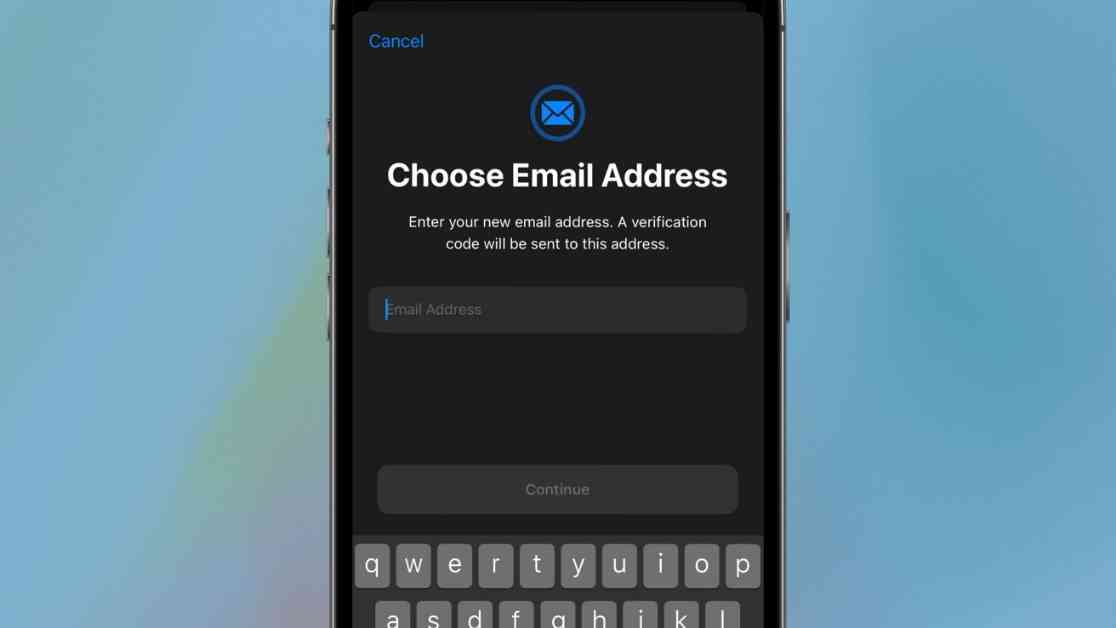
6. Choose your new Apple ID email.
If you prefer to change your Apple ID email on the web, the process is similar. After entering your new email, you will need to verify it by opening a link sent to your new email address. However, if you have Stolen Device Protection enabled, there will be a slight delay in the process.
When changing your Apple ID email with Stolen Device Protection enabled, you won’t be able to do so on the web. Instead, you will need to change it directly from the settings on one of your devices. The main difference is the security delay, which could take up to an hour to complete.
To change your Apple ID email on your iPhone with Stolen Device Protection enabled, follow these steps:
1. Open the Settings app.
2. Tap on your name.
3. Tap on Sign-In & Security.
4. Tap the Edit button next to Email & Phone Numbers.
5. Delete the old email labeled as your Apple ID.
6. Start your security delay.
Once the security delay has ended, you will receive a push notification on your iPhone. You will then have an hour to complete the change. If you miss the window, you will need to start the security delay again.
Changing your Apple ID email is a simple process, but it’s important to be aware of any security settings that may cause a delay. By following these steps, you can ensure that your Apple ID is always up-to-date and secure.


")

